Paving
- b00123390
- Mar 13, 2021
- 8 min read
Updated: Apr 7, 2021

Image - Kilsaran
What is Paving?
Paving is the covered surface of a public or private area - roads, driveways, pathways, or patios. It helps make the space more useful to traffic, both pedestrian and vehicular, while adding aesthetic value.
How to Keep Safe
When a paving project is planned due care must be given to being aware of the risks below ground. Underground services within residential areas are usually ducted and can be identified as such:
Electricity supply , both underground and overhead, usually red
Gas supply pipe - yellow
Telephone cable - grey
Cable TV cable - black
Water pipe - usually blue or possibly lead
Drainage pipes- PVC, concrete, or clay
Foundations - concrete, blocks, bricks, or stone.

Most dangers are reduced by being aware of the risks and hazards of the working environment and by wearing PPE (Personal Protective Equipment).
(a) Steel toe-capped safety boots, or wellington boots if using wet concret
e. Footwear should bear the EN345 symbol.
(b) Appropriate gloves for the job being undertaken to prevent physical or chemical damage to the hands. Anti-vibratory gloves are also available.
(c) Dust masks should be of EN 143/EN149 safety standard.
(d) Eyes should be protected with the use of safety goggles., ears protected by ear defenders.
(e) Overalls or workwear should be worn to protect the skin from damage. No loose clothing which could get caught in machinery.
(f) Hard hats worn if working overhead or in trenches.
(g) Awareness of the dangers while working with cement.
(h) Knowledge and awareness of the dangers working near sewerage systems.
Types of Pavers
Images Kilsaran & Roadstone
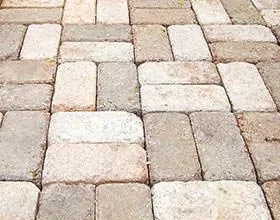
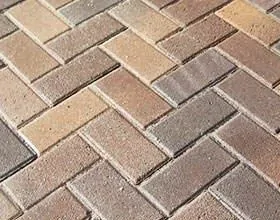
Brick pavers are manufactured from concrete , coloured by pigments giving a wide range of colours. There is plenty of choice regarding bond patterns eg. herring bone or basketweave and the blocks can be laid on their edge or flat. The tools required to lay brick pavers are a hammer, pitching tool, mechanical saw, and guillotine.
Concrete paving slabs are pressed and vibrated during manufacture and are non-slip, coming in various colours and sizes and are usually the most reasonable to buy. They are laid on a mortar bed of no more than 32mm depth. The mortar mix can be either 1/5, cement/sand or 1/2/5 cement, lime, and sand. A dry mix of 1/4 is then brushed into the joints. The slabs should be pointed with a damp mix of mortar and key jointed. Tools required are hammer, pitching tool and mechanical saw.
Stone slabs or flagstones are available in many shapes and colours , are non-slip due to their sawn surface and approximately 50 mm thick. All types of stone can be used eg. granite. Jointing is usually done with mortar as the job progresses.
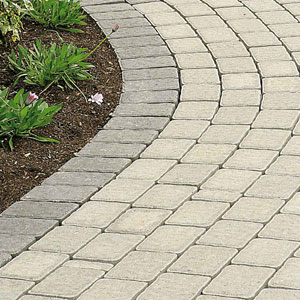
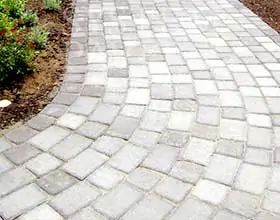
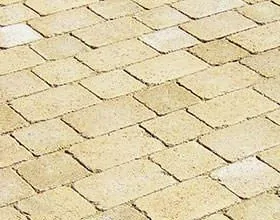
Cobble stones or cobble blocks are manufactured from concrete with pigments and are uniform in size. They are laid on mortar with mortar between the blocks. It is inexpensive and is laid using a running bond i.e., the blocks are laid across the width of the driveway followed by successive rows of horizontal blocks with staggered joints using blocks of different sizes.
Paving Patterns

Image - Pinterest
Basketweave Circular Herringbone
Stretcher Bond Staggered Bond
Images selectpaving.ie
10-Step Paving Process
1. Decide which material and method of laying.
2. Consider what drainage is required.
3. Lay out the perimeter with string lines and pins.
4. Remove the top 200 - 300mm of clay.
5. Set out falls using restrainers bedded on concrete foundations.
6. Haunch restrainers in position using concrete.
7. Laying: 150mm compacted hardcore (100mm concrete slab on top for rigid paving)
8. Screed with 50mm of compacted grit/sand.
9. Lay pavers 6mm above desired finished height placing block tight against previously laid block, ensuring no gaps.
10. Brush in fine sand and compact bricks into position.
Kerbstones & Falls
Edge restraints (brick kerb, concrete kerb, or bull-nose kerb) play a crucial role in paving. They define the perimeter of the paving where channels for drainage may be incorporated. They prevent paving moving causing pooling of water, vehicles causing indents, grass or weeds growing in the joints or paving becoming loose.
A ‘fall’ or gradient needs to be accounted for in the paving for surface water to run off. This fall should be accommodated in the subbase. Falls vary from between 1/40 and 1/80 (recommended) and directed away from the building towards wastewater drains. To calculate a fall, use the formula -
Distance ÷ Gradient = Fall
eg. 10m ÷ 1/50 = Fall
10m ÷ 50 = 0.2m (or 200mm)
Therefore, for every 10m distance the fall drops by 200mm.

Linear Channel inserted for drainage
Image pavingexpert.com
Methods of Laying Paving
Expansion joints are incorporated into rigid paving where the base and paving meet walls, piers, columns, or areas that exceed 6m in any direction and filled with polysulfide sealant.
Rigid (solid) paving is usually used in areas of heavy traffic using herringbone bonding eg. on roads. It is laid on a concrete base slab 100 mm thick on top of 150 mm of compacted hardcore. The pavers are then laid with either:
(a) mortar no more than 20 mm both underneath or between blocks or
(b) 50 mm of compacted grit/sand, screeded.
Flexible paving is the most economical and commonly used paving as it does not require a concrete base. It is laid onto 150mm of hardcore with 50mm of grit/sand compacted on top. The pavers are laid 6mm higher than required finished height. Fine sand is brushed in before the bricks are interlocked by compacting into position. Herringbone is the recommended pattern used.
Transferring Levels
The datum level on a construction project is a random horizontal plane of reference from which all vertical dimensions are measured. It can show vertical height differences between levels of a building or from one part of a site to another. The datum level is usually the same level as the finished floor of a building.
There are three methods of transferring levels:
1. Levelling Board & Spirit Level: This uses a long straight edge of timber with parallel sides and a spirit level which is placed on top in the centre.

Image Pavingexperts.com
2. Boring rods are used in sets of three. Each rod is made of timber in a T shape and the height of each rod must be equal. A peg is placed a spirit level distance away from the datum and adjusted until level. The first boring rod is secured, the second rod set at the same level and tops checked to be horizontal using the spirit level. The third rod (traveller) can be put at any point between the first two rods, made level, and the line of the three rods checked by eye.

Boring Rods

Checking boring rods by sight
Images pavingexperts.com
3. Water level method has a variety of uses e.g., it can be used around corners. A rubber hose has a glass tube attached to each end. Water is filled into the hose slowly, so no air bubbles are trapped. When the tubes are held at the same level the height of water is equal in both.

Image amazon.co.uk
All gauges should be taken from a known level surface i.e., the DPC (Damp Proof Course).
Step by step block paving
Preparation
1. Mark out perimeter edge using sand or spray adding 300mm each side to allow for haunching of kerbs, noting services in the area.
2. Remove top 200mm (100mm subbase, 50mm sand base plus 60mm block) of soil and dispose. Finished paving level must be 150mm below DPC.
3. Each m3 of material dug out becomes 1.3 m3 for disposal. Install drainage as required and continue to lay full blocks working from a section of already laid paving check for alignment using lines, adjusting if necessary, and then caught in the edges.
4. Set out string lines for edge courses, laying edging bricks on a concrete bed.
5. The edgings are then haunched with at least 75mm of thick concrete.
Sub-base
1. Spread, level and compact hardcore to at least 100 mm thick accounting for falls of the finished paving. If only using 100mm thickness a geotextile membrane needs to be laid under the hardcore.
2. Any voids in the subbase should be filled with grit sand and compacted before laying the bedding course.
Bedding
1. Spread, level and compact bedding sand and screed to the correct level . If using 45° herring bone pattern lay out starter course of blocks square to the building, 90° herringbone pattern is best started at the corner of a building.
1.


Images pavingexpert.com
Block laying
1. Continue to lay full blocks working from a section of already laid paving. Check for alignment using lines, adjusting if necessary, and then cut in the edges.
Finishing off
1. Fit gulley covers if necessary. Brush in dry jointing sand and compact paving with the compactor (whacker). Make 4-6 passes over all the paving. If using clay bricks use a mat attached to the compactor to prevent damage to the paving.
Arcs and Curves
Geometry is used to establish lines, levels, curves and arcs on paving projects. Larger projects use Laser levels or theodolites can be used on larger projects but a string line, spirit level, tape measure, marker pegs (12mm steel rod pins) can also be used. A string line can be started by fastening onto a marker pin using two knots, the string is then half-hitched on subsequent pins until the work is set out. Below is an example of how to lay a curved, paved path.
2.
Straight Lines

The start and end pins are positioned first with the intermediate pins just touching the taut string line at the halfway mark. For example, on a 10m line, starter pins are inserted at 0 and 10m with the intermediate pin inserted at 5m . Subsequent pins can be set at the 2.5m and 7.5m marks and so on and checked by eye. Pins need to be inserted completely vertically.

Checking alignment of straight lines & pins
Images paving.expert.com
Installing Edgings
Images Kilsaran
Concrete-bedded edgings are essential for block paving where rigid support is needed at the perimeter of the path. They need to be bedded into a medium strength concrete base.
1. Lay out bedding material. Tamp the concrete to the approximate level of the underside of the edging or kerb. Allow for the addition of the mortar bed. When concrete has hardened the kerbs are laid on a mortar bed between 12 and 20 mm thick.
2. Lay out the edging on top of the concrete bedding and tap down to the required height. The string line guide should be followed as closely as possible so that edgings are never more than 3 mm above or below the guide. To account for required falls, the edging levels should be checked crosswise, not lengthwise.
3. Haunching is done when the laying is complete, and the alignments have been checked on both the face and on top of the edging or kerb. The haunching concrete is laid on the outside edge of the edging at least 100 mm wide for a driveway plus 2/3 the height of the kerb. The haunching concrete is then compacted and smoothed with a trowel or spade.
Trammel Bars or Screed Rails
Where there is no kerb, edging or soldier course a trammel bar or screed rail can be put into the bedding material to serve as a guide when leveling and screeding the bedding layer. These bars are long, straight rods or timber usually 3 - 4.5m long.

They are laid in the bedding layer so that the top level of the bars are at the level required for the surface of the screeded bed. They should be very secure and not move while screeding. Once screeding is complete the trammel bars are carefully removed and the hollows, they leave behind are then filled in with bedding material.

Safety Notes for Using Power Tools
Images expresshire.co.uk
Fatal accidents occur on sites when unsuitable or badly maintained equipment is used or when there is a bad connection to the power supply . Accidents may also happen through lack of awareness regarding overhead or underground electric cables.
Precautions before using any power tools.
1. User properly trained for the use of the specific tool.
2. Ensure all safety guards are in place.
3. Appropriate PPE is worn.
4. Power tools must be inspected and maintained regularly .
5. Cables should be in good condition, off the ground and away from water.
6. Sockets should not be overloaded with appliances. Circuit breakers should be used where main voltage is used.
7. Electric drills, angle grinders, concrete saws - The blade or bit should be appropriate for the job required. If drilling masonry, the drill is set to hammer action. All guards are in position and safety clothing worn.
8. Transformers - All power tools to use a transformer reducing 230v A/C down to 110v A/C.
9. Appropriate drill bits fitted and used according to the job.
10. Consaws - Petrol engine consaws should not be used in an unventilated area. The correct blade/grades used should be appropriate to the job.
11. Block and slab splitters (guillotine) are simple to use and maintain.
References:
1. Paving Expert. 2021 Available at: www.pavingexpert.com [Accessed 10.03.2021]
2. Western Interlock (2020) How to lay a Curved Paving Stone Pathway. Available at: https://youtu.be/UX8HaMuCciA [Accessed 12.03.2021]







Excellent blog. amazing attention to details with great images.
Brilliant blog on paving fiona, really good explanations. Eric
Super blog Ciara. Great use of images! Elaine
Hi Ciara, loads of detail and lots of expansion on the topics outlined in my lessons. The materilas and information from the pavingexpert.com are such good qulaity (it’s the only resource you will ever need). Great images and videos and all aspects well explained and presented. Well done.
Thanks
Robbie